機能概要
AdGuard VPN for Macは、デスクトップVPNサービスです。 AdGuard VPNはAdGuard広告ブロッカーと完全な互換性があり、併用することが可能で、シームレスに動作します。 さて、どんな機能があるのかを見てみましょう。
AdGuard VPN for Macを使用するには、AdGuardアカウントにログインする必要があります。. AdGuardアカウントでログインするか、外部アカウント(Apple、Google、Facebook経由)でログインすることができます (外部アカウントの場合、AdGuardアカウントと同じメールアドレスのアカウントを使用してください)。 AdGuardアカウントに適切なサブスクリプションがある場合、AdGuard VPN for Macアプリでログインの際にそのサブスクリプションが自動的に有効化されます。 まだAdGuardのアカウントをお持ちでない方は、 こちらからご登録いただけます(アカウント登録に必要なのははメールアドレスのみです)。
AdGuard VPN for Macは現在macOS Catalina (10.15) より新しいバージョンのmacOSをサポートしています。
ホーム画面
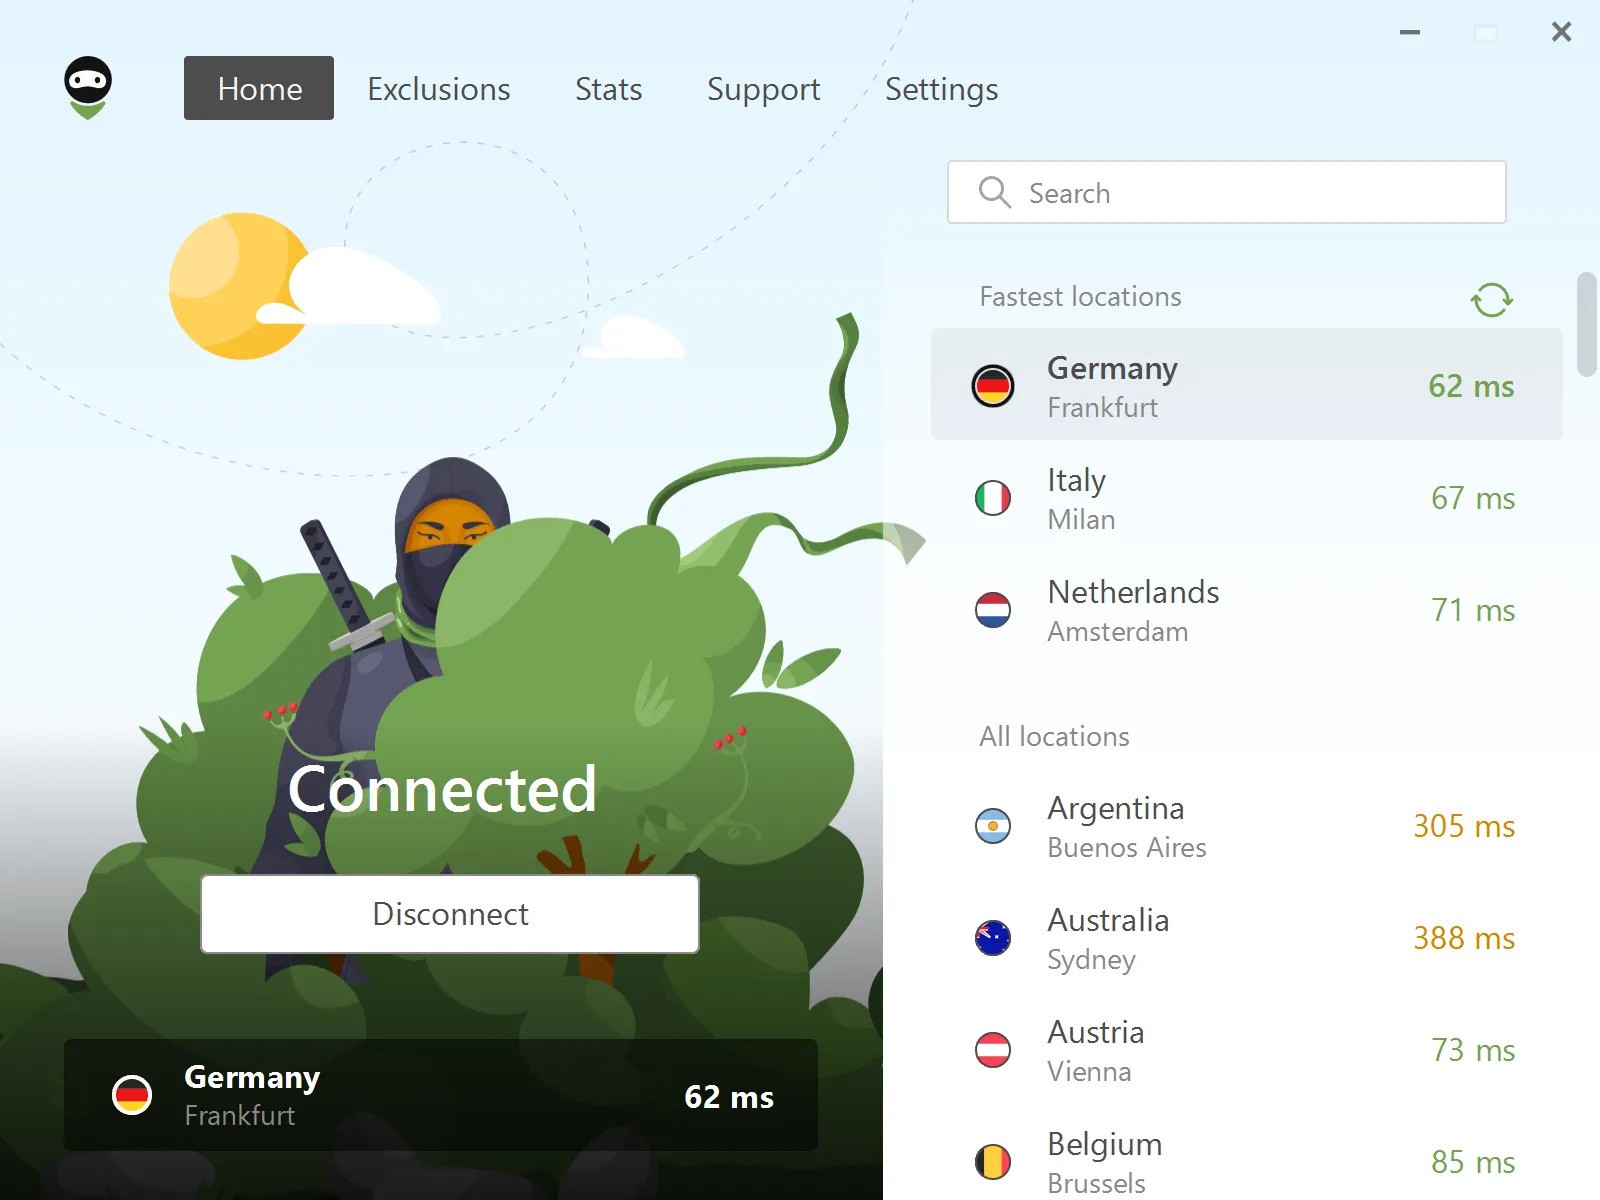
最初のタブは、 ホーム画面です。 Here you can see the current status of AdGuard VPN, the selected location (if enabled) and its ping. pingとは、VPNサーバーの応答時間です。 The lower the number, the faster the connection. If VPN is disabled, the last location you connected to is displayed at the bottom.
The fastest locations with the lowest pings are displayed in the upper right corner of the screen. There is also a refresh button that you can click if any locations are offline. その下には、全ロケーションの一覧が表示されます。 The search field makes it easy to find the location you need.
無料ユーザーは特定のロケーションにしか接続できず、それ以外のロケーションはロックされています。 その上、無料版では月間3GBというデータ通信量制限があります。
VPN対象外リスト(サイト除外機能)
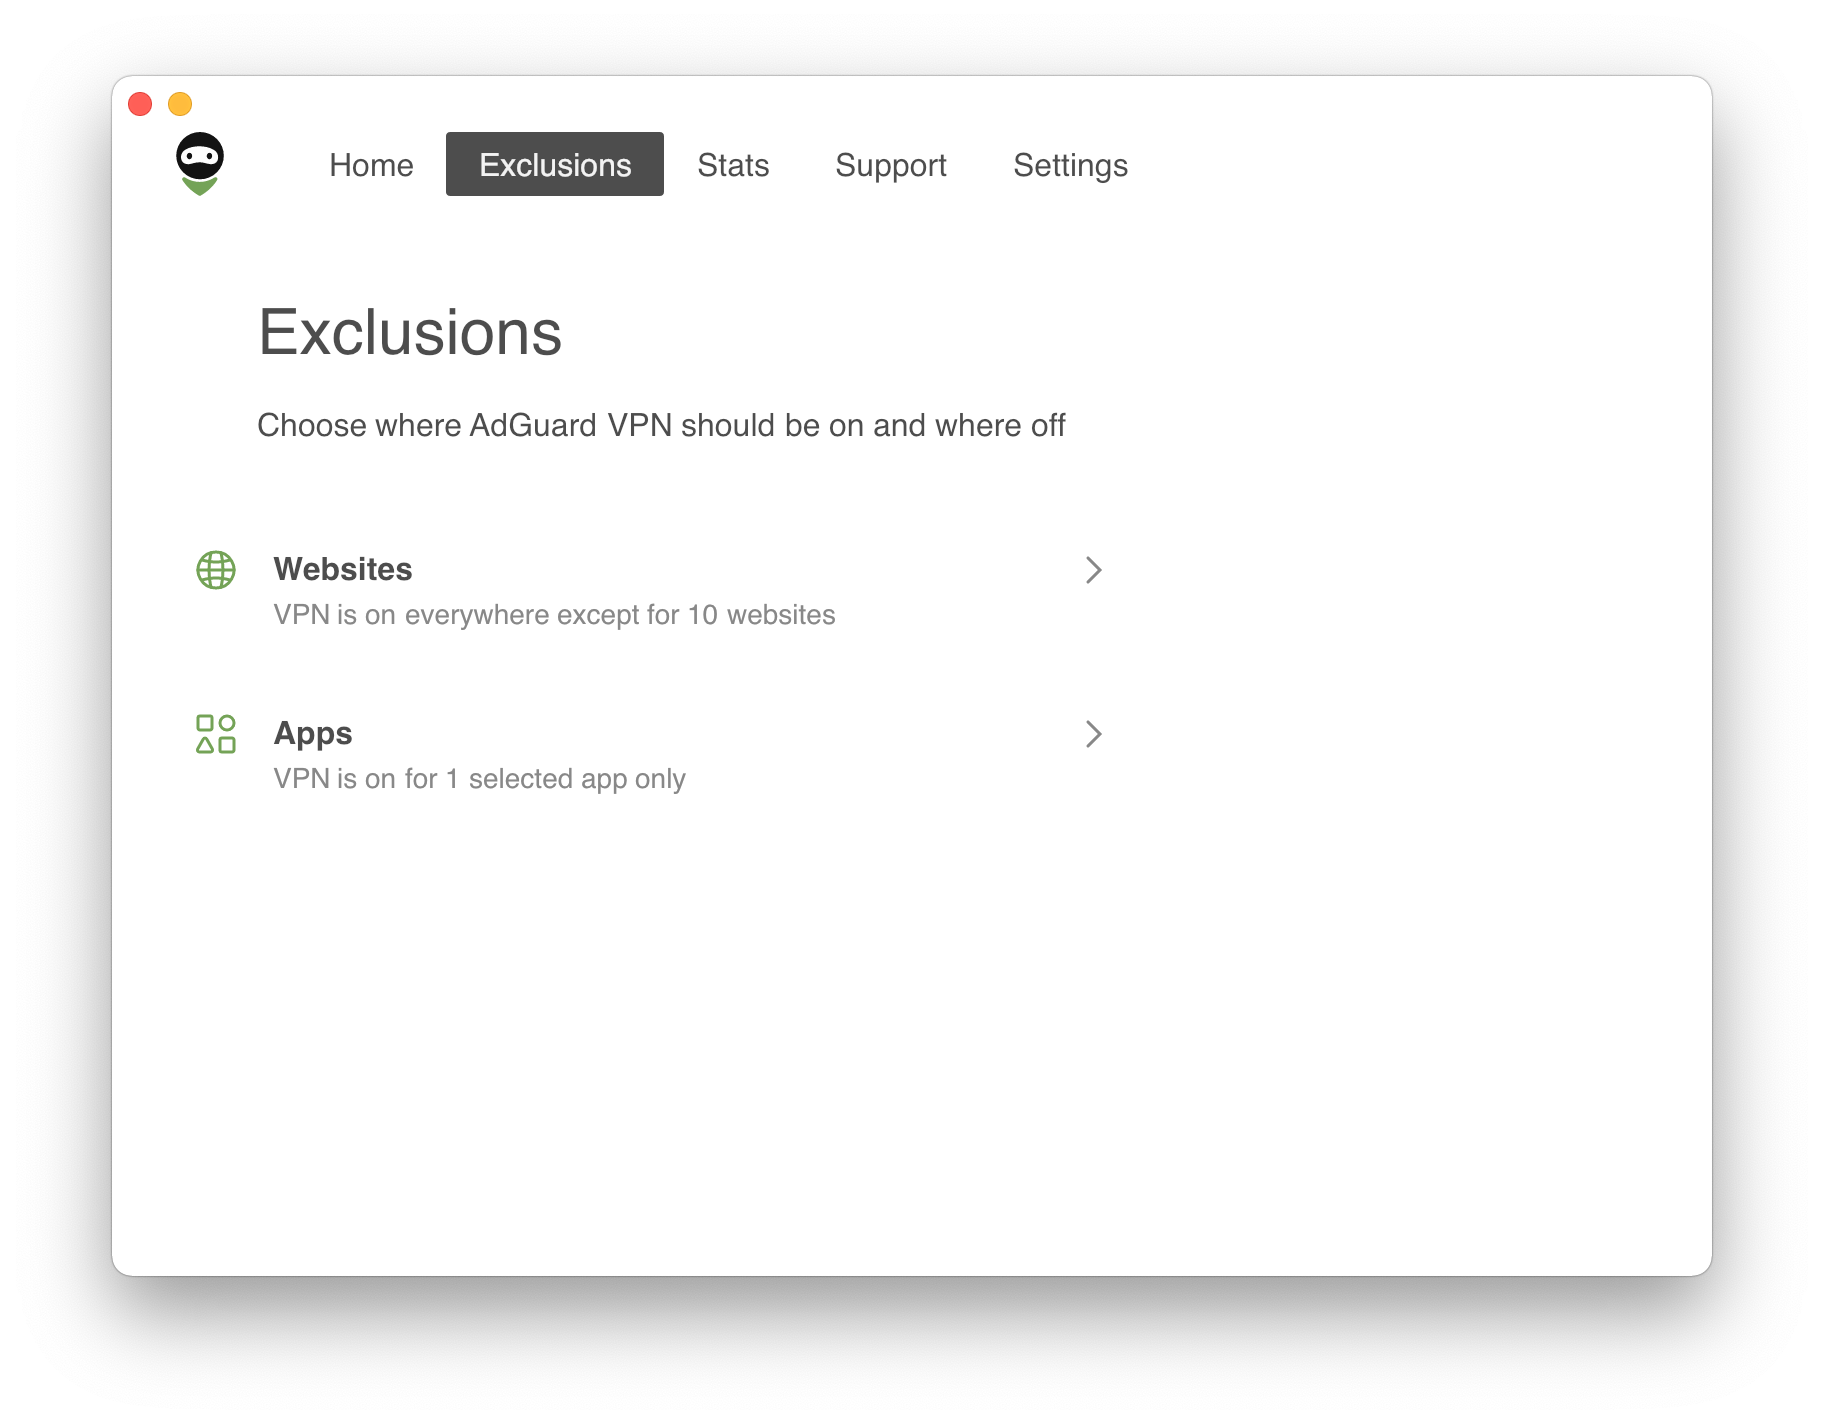
AdGuard VPN has several features that make it unique, and one of them is definitely Exclusions. By default, AdGuard VPN will run on all websites and in all apps but the ones from the exclusions list. But you can switch to the other mode, so AdGuard VPN will run only on websites and in apps from the exclusions list.
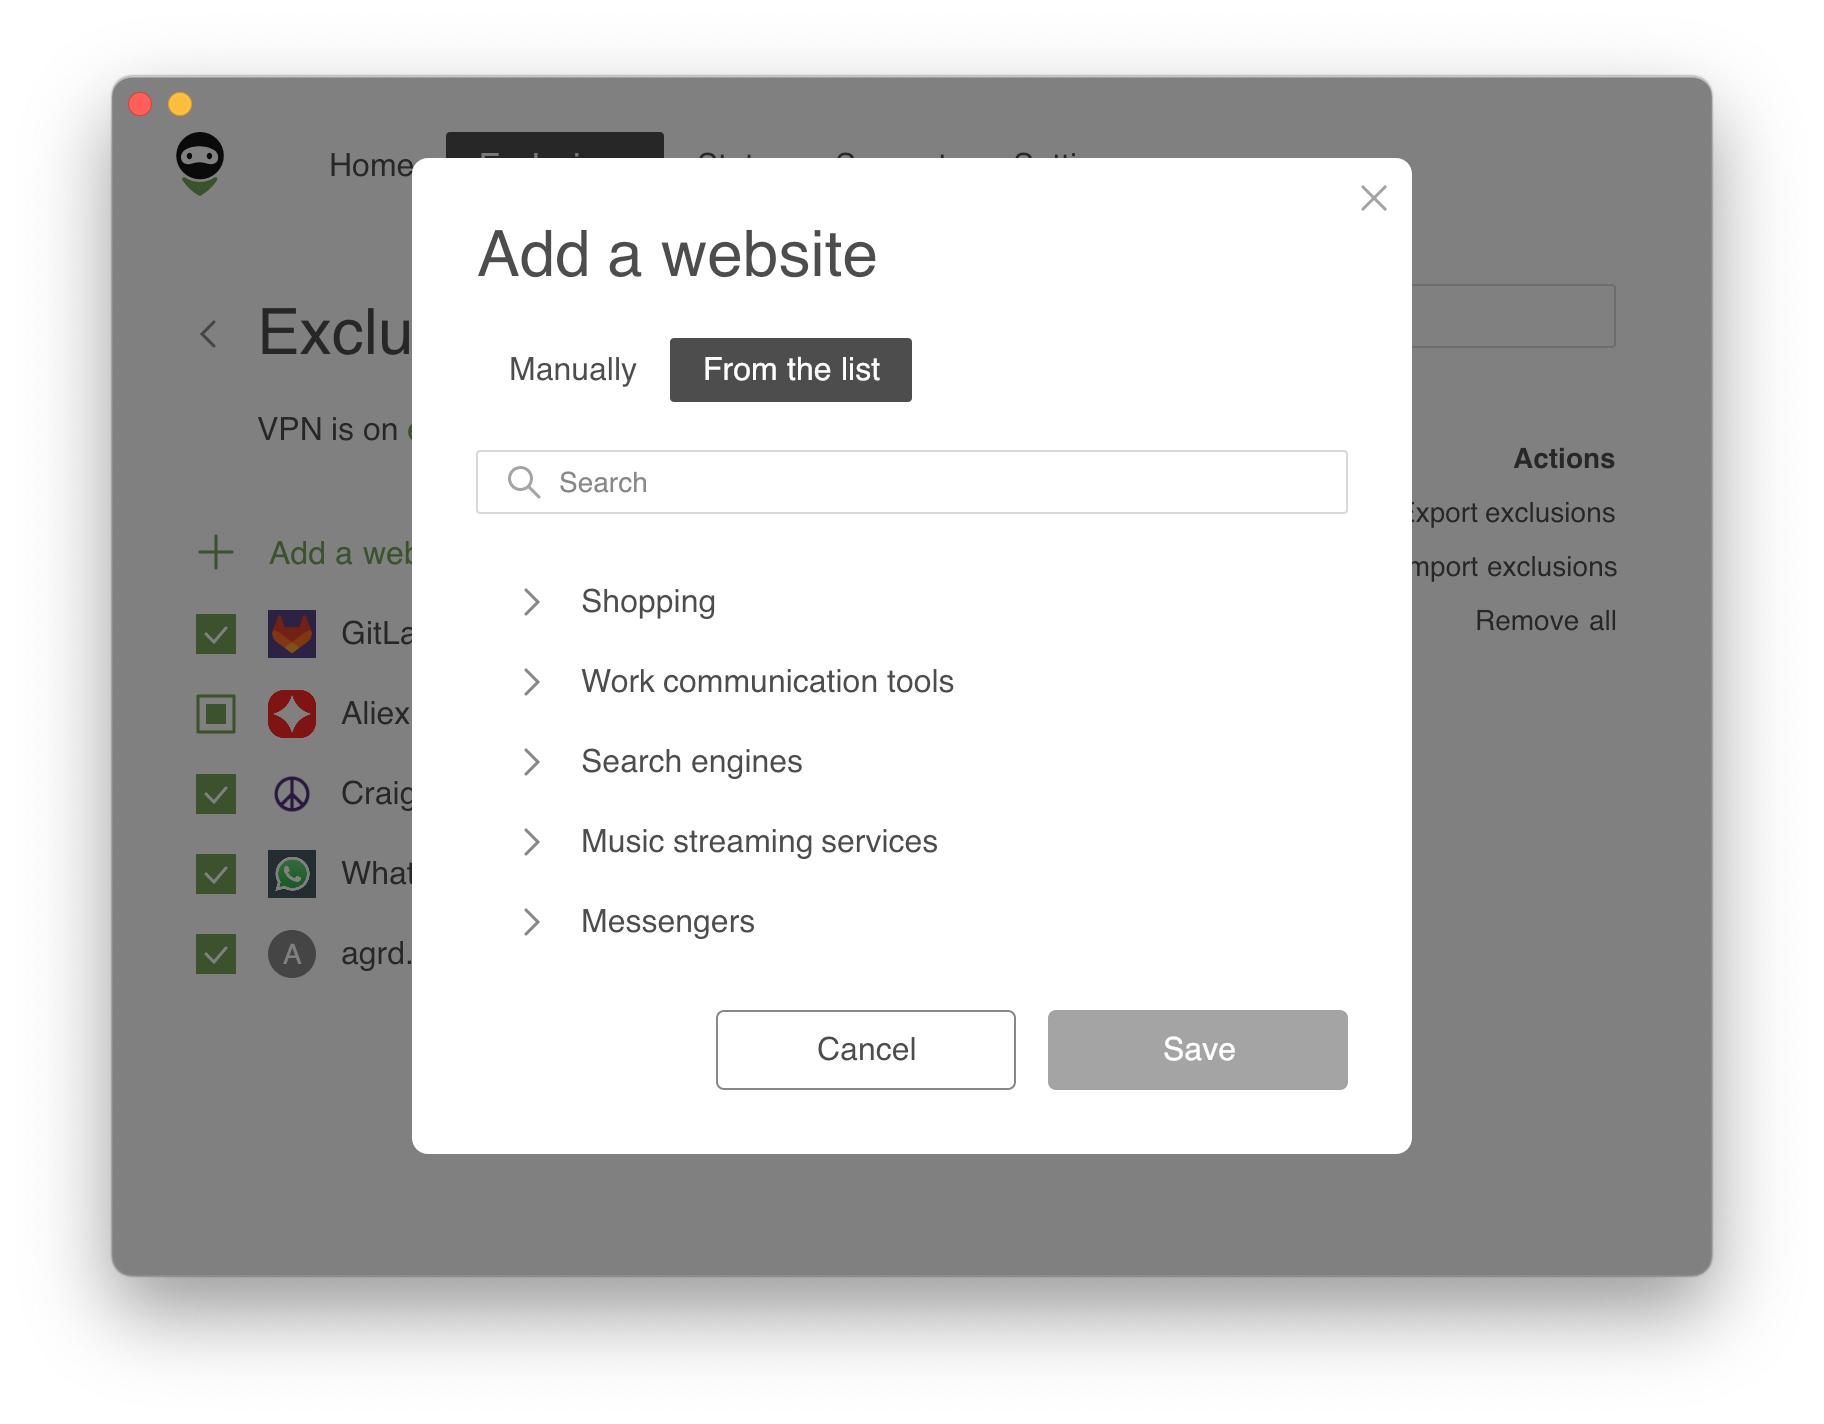
Webサイトを手動で対象外リストに追加するだけでなく、人気のあるサービスの既存リストから選択することもできます。 リストは8つのカテゴリーに分けられています(SNS、メッセンジャー、動画・音楽配信サービス、ゲーム、ショッピング、検索エンジン、ワークコミュニケーションツール)。 これらのサービスカテゴリは、ワンクリックで除外リストに追加することができます。 これは特に、指定モードを使用する場合に便利です。
対象外リストの設定も簡単に行えます。 ドメインとそのサブドメインのいくつかを追加した場合、それらはルートドメインをもとにグループ化されます。 ルートドメイン(example.com)を追加すると、そのマスクも追加されます(*.example.com)。
サービスを追加したり、何かを変更または削除した後に、初期設定を復元したい場合は、ドメインの横にある「元に戻す」を押してください。この操作により、見つからないドメインが復元され、すべてのチェックボックスにチェックが入ります。
さらに、既製の対象外リストは、(AdGuard VPNをインストールした)他の端末に以降することができます。 対象外項目をエクスポートする方法は以下の4です:
- 除外リストのエクスポート元となる端末で AdGuard VPN を開きます。 Find the appropriate section and click the Export button.
exclusions.zipというアーカイブがダウンロードされます。 - アーカイブ内には、
.txtファイルが2つあります(一般リスト用と指定リスト用のファイルです)。 アーカイブのファイルに、さらに除外項目を追加したり、既存のものを削除したり、ファイル名を変更したり(これについては下記もご確認ください)、そのままにしておいたり、自由にカスタマイズできます。 - 異なる端末間で除外リストを移行する場合は、インポート先端末に
.zipファイルを送信することを忘れずに。 (例えば、Macからの除外リストをiPhoneにインポートする場合、事前に.zipファイルをiPhoneに送信しておいてください。) - 除外リストのアーカイブをインポートしたい端末でAdGuard VPNを開きます。 Find the appropriate section, click the Import button and select the archive. 完了です。
Archive files from other devices can be similarly imported to your AdGuard VPN for Mac.
Stats
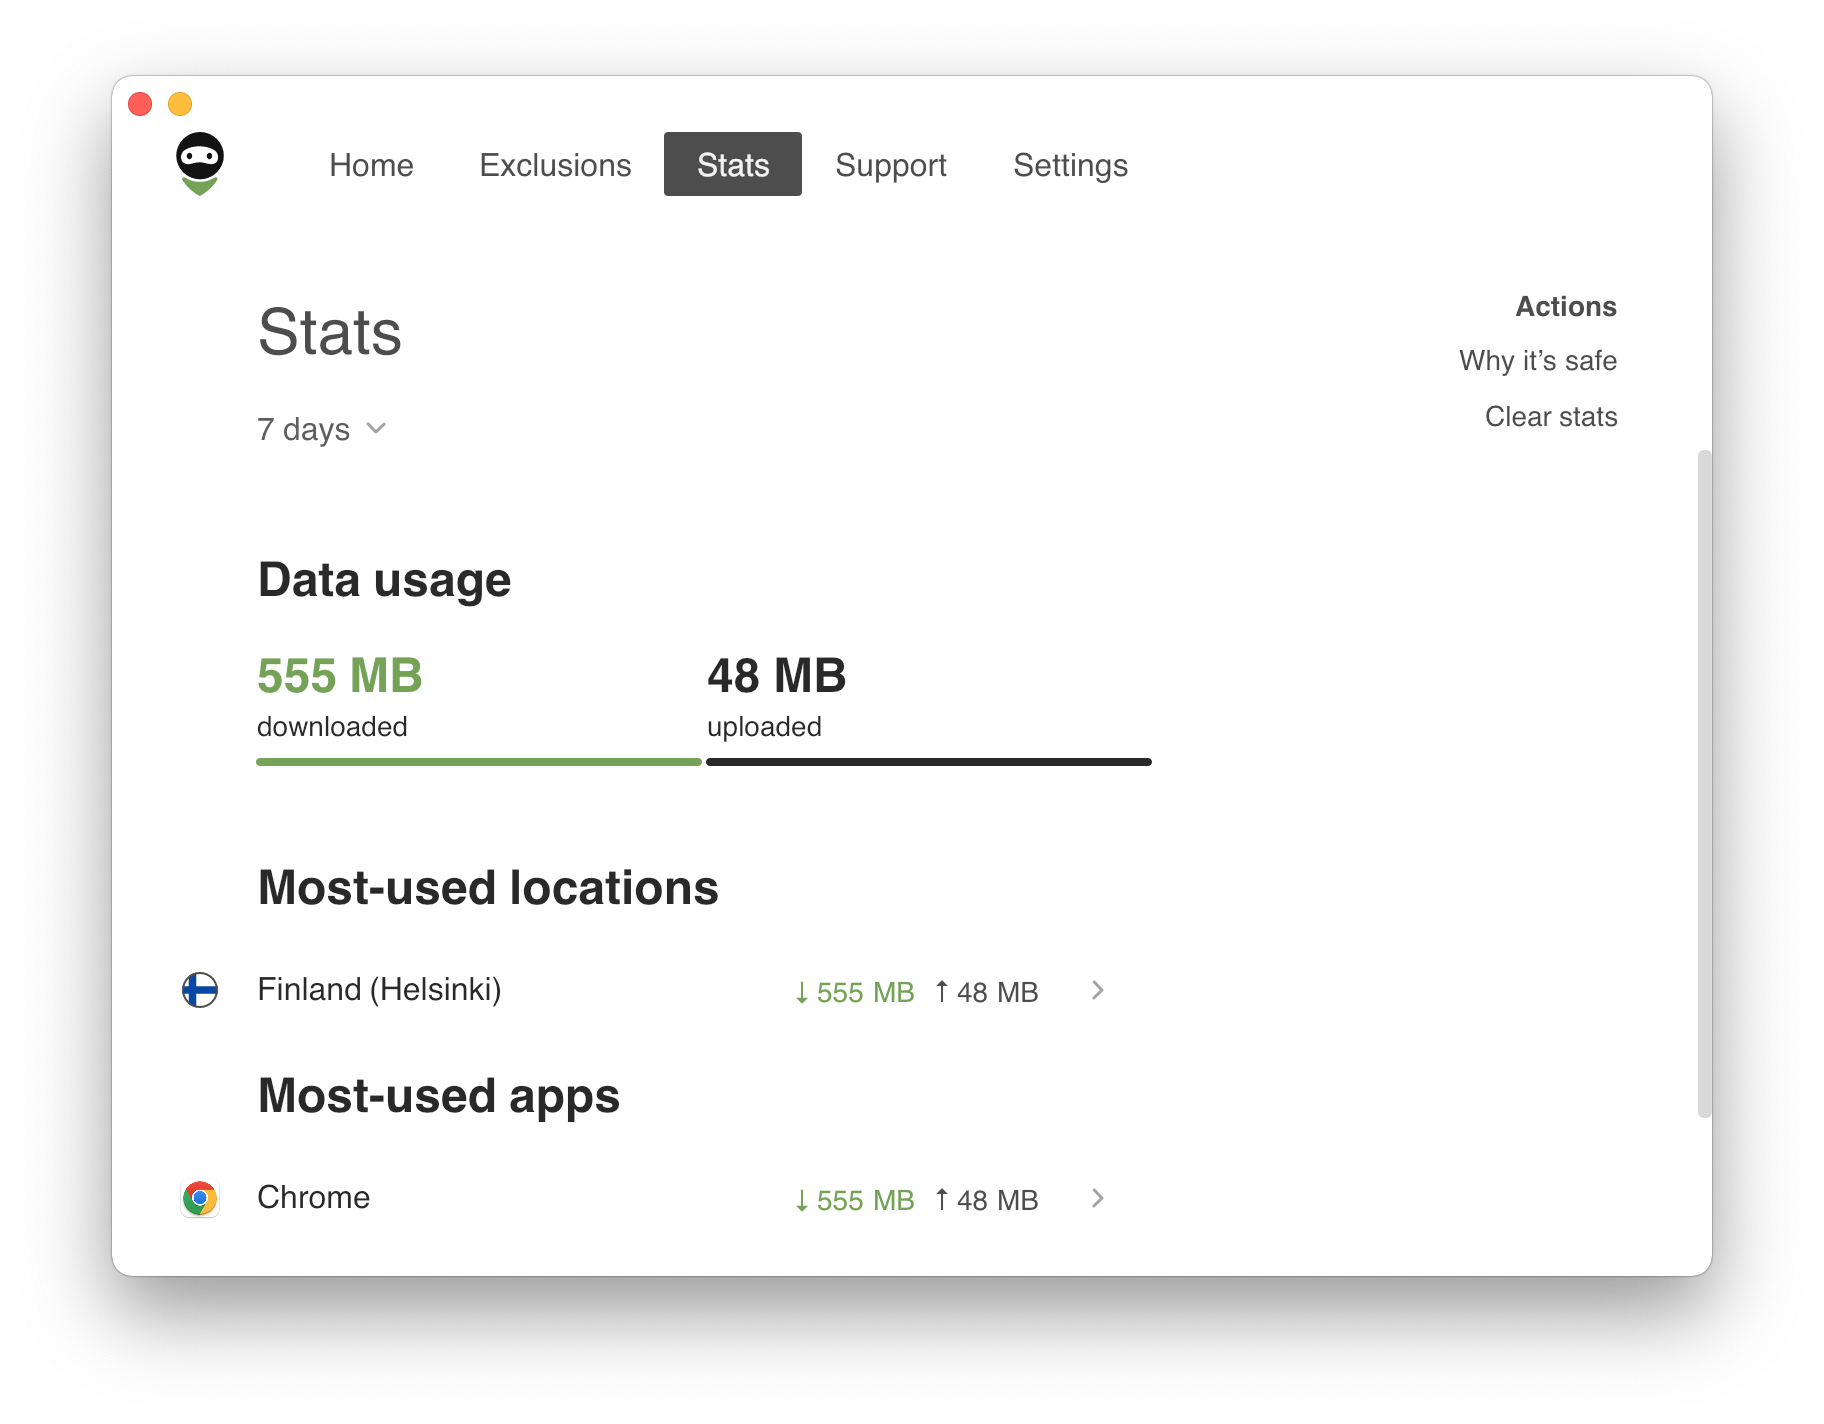
The Stats screen provides detailed information about traffic consumed by location and app, most used locations and apps. View data for the day, month, or the entire time AdGuard VPN for Mac has been in use.
Importantly, all data is stored locally on your device, so no one but you has access to it. The Statistics feature is available to users with an AdGuard VPN subscription.
サポート
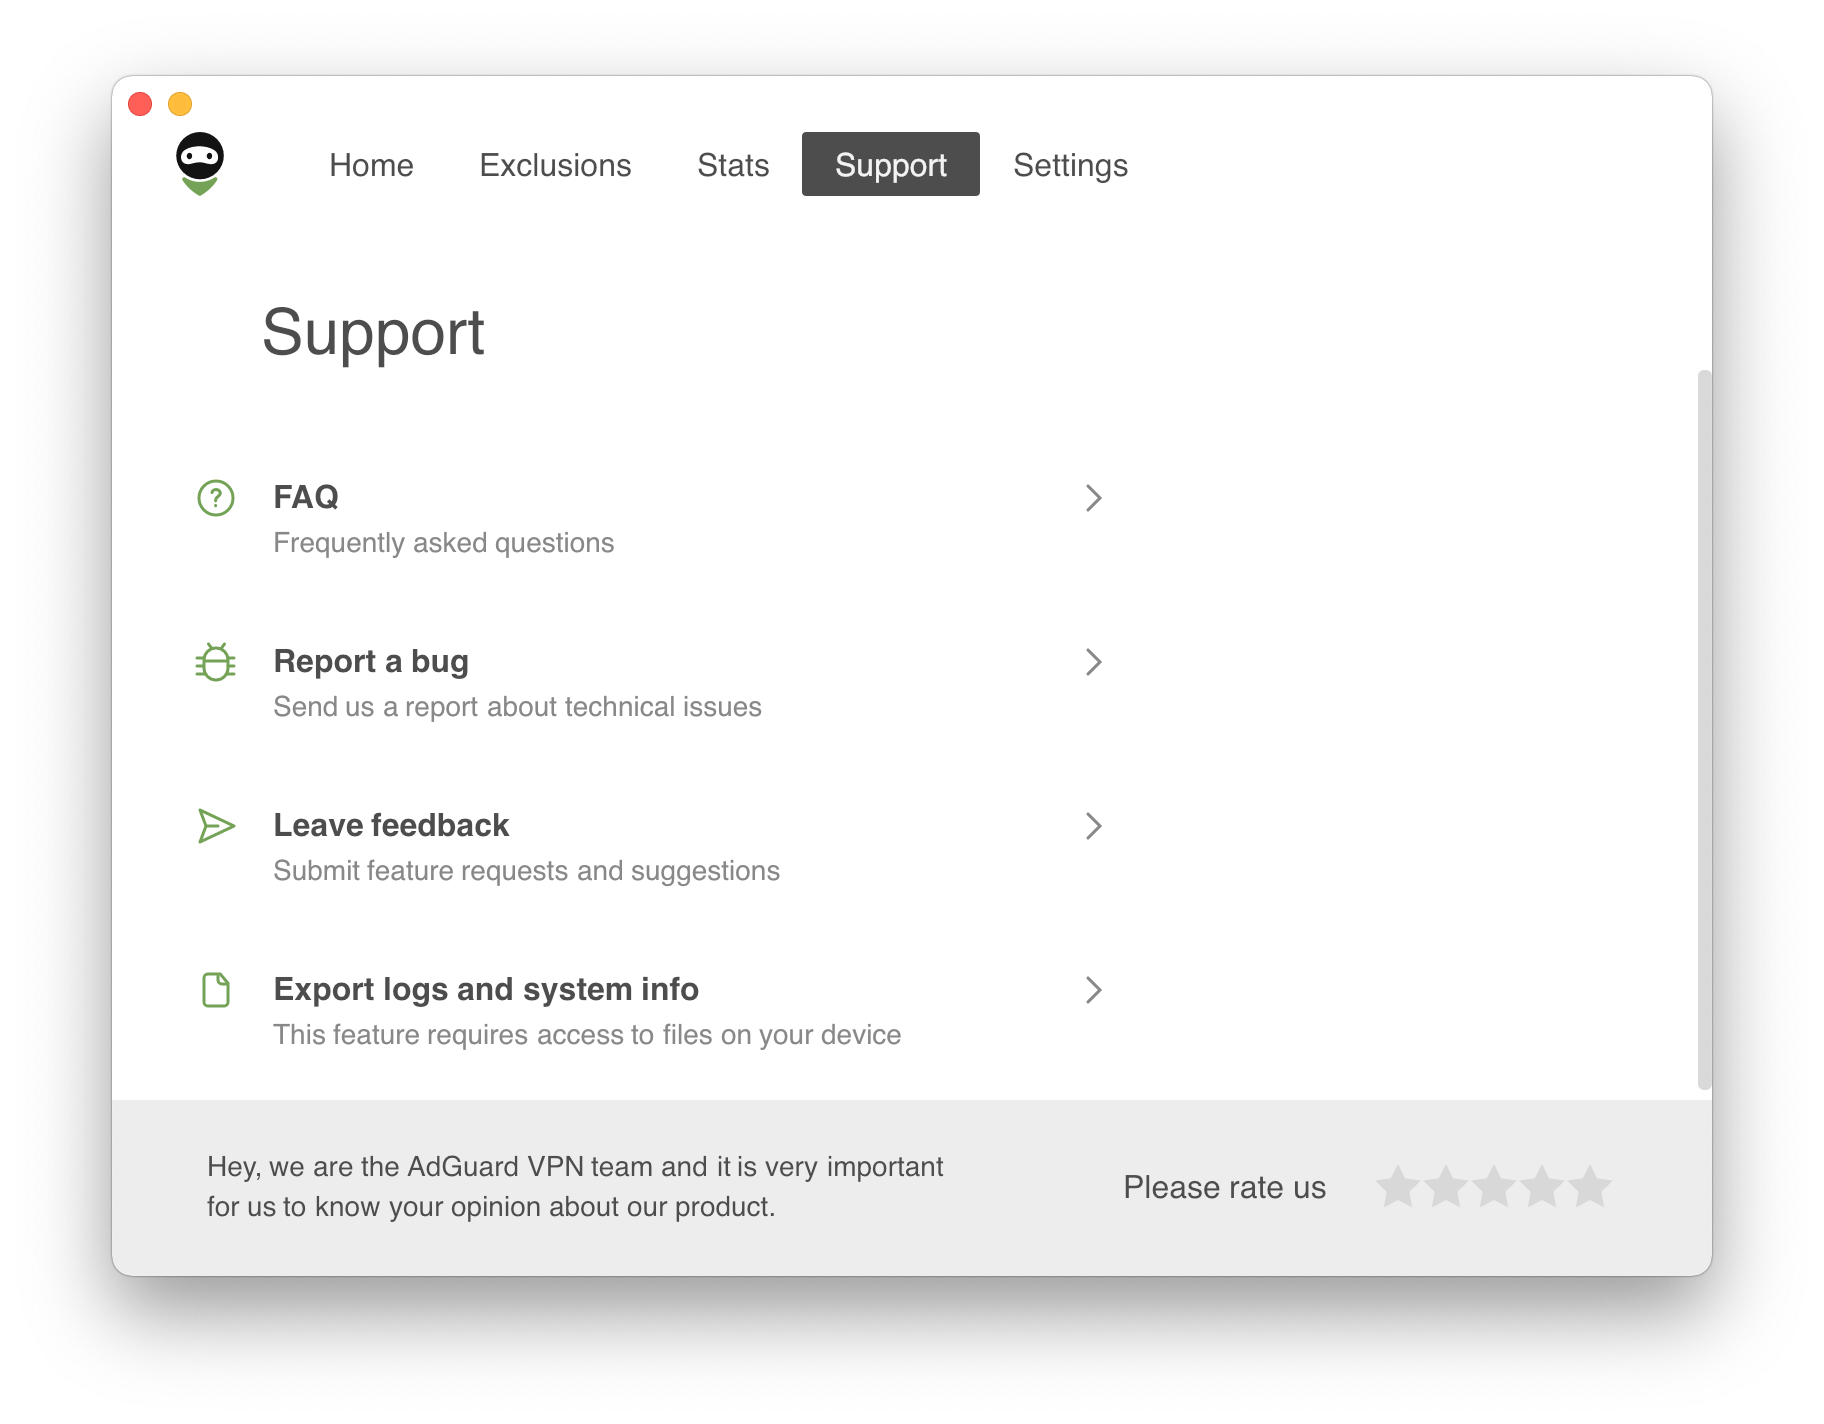
The fourth tab is the Support screen. Find answers to any questions in the FAQ or in the Knowledge base sections, report a bug if you encounter one, or discuss AdGuard on any of the platforms. And feel free to leave feedback about our product, we’d appreciate it.
設定
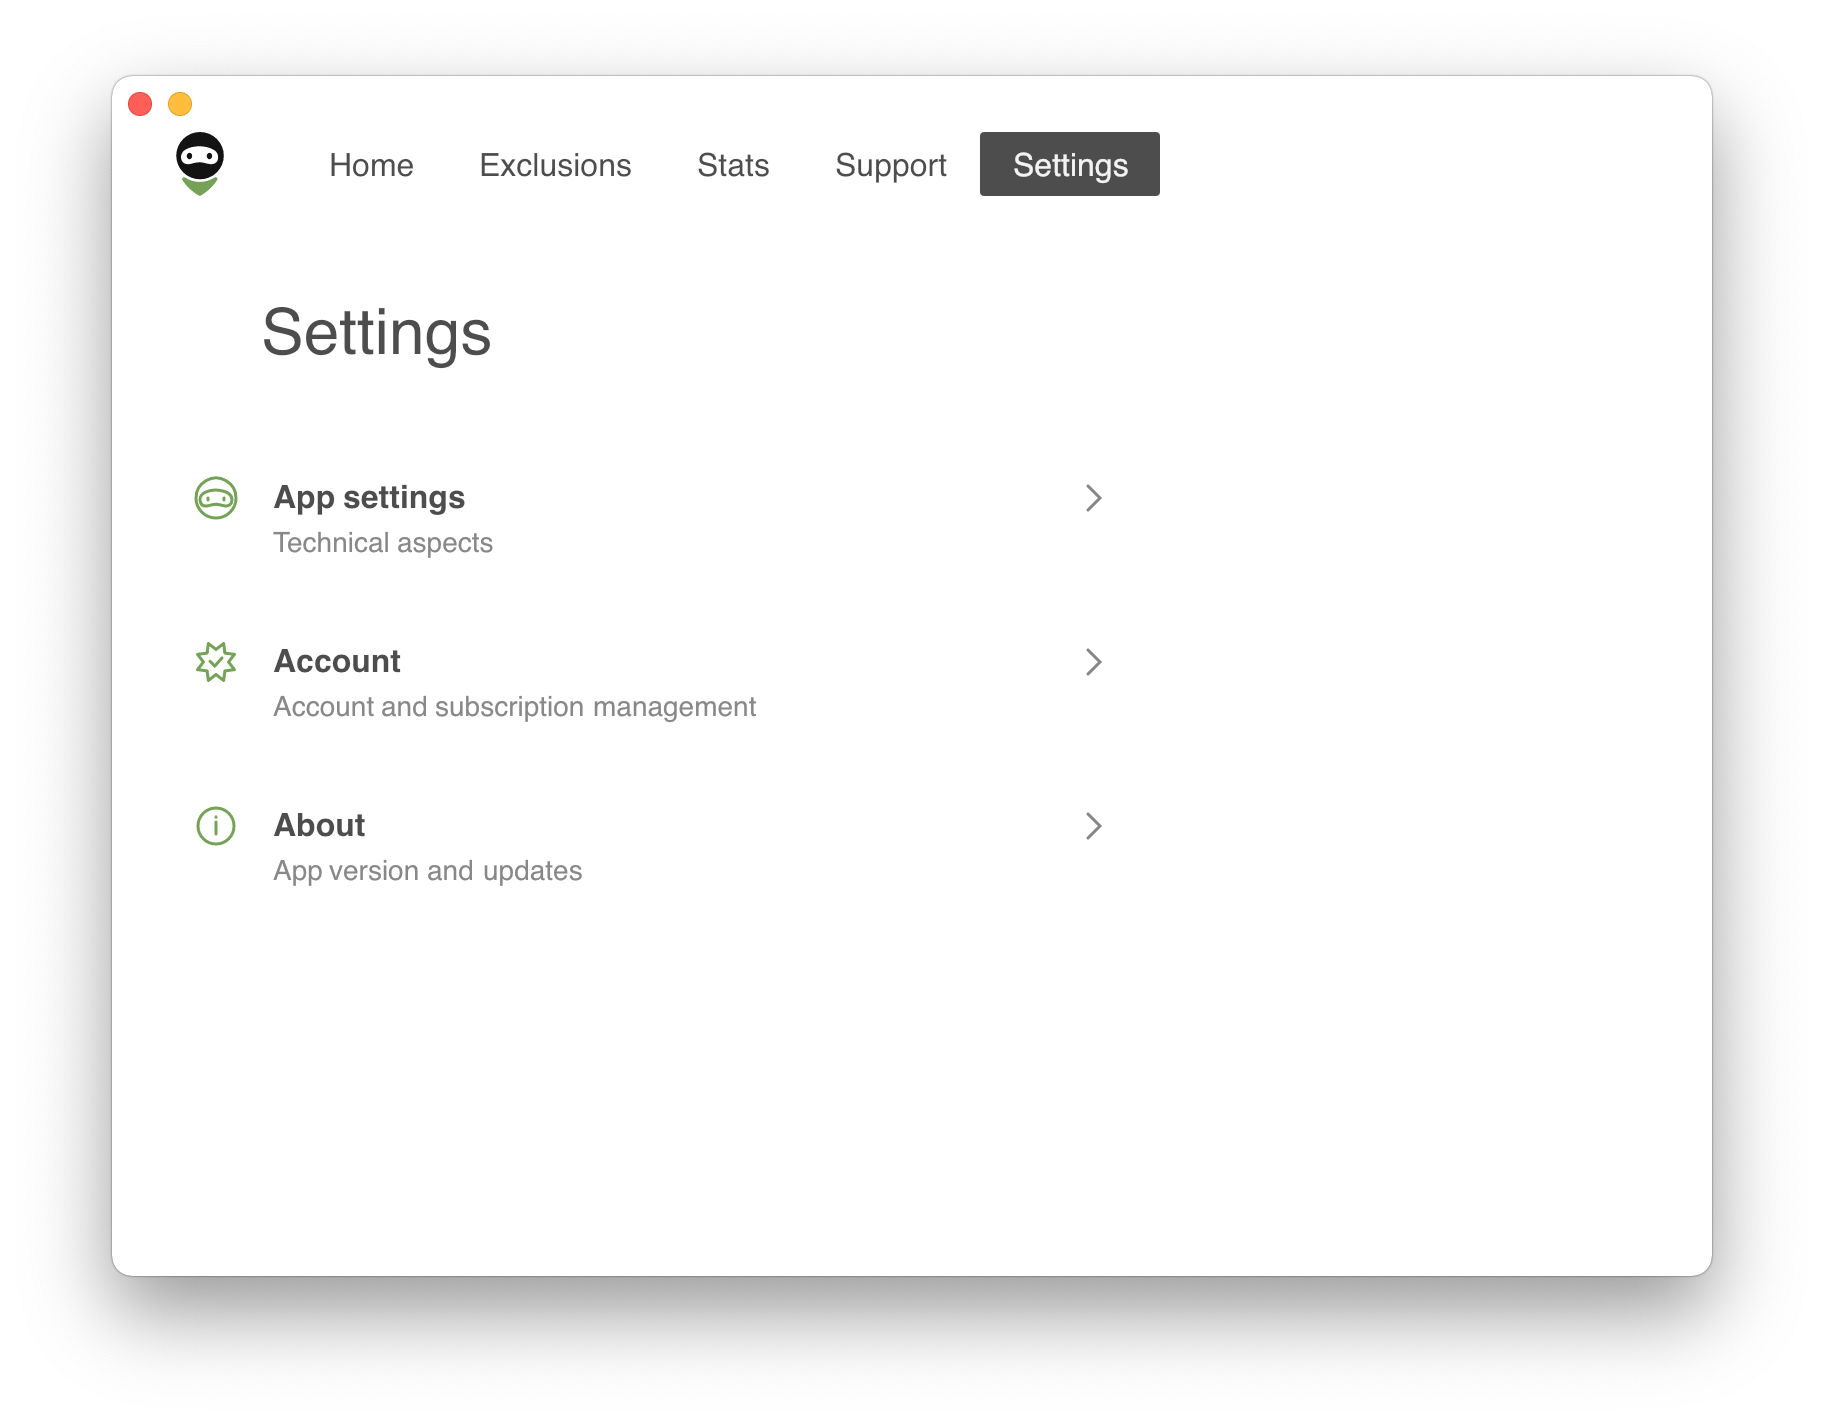
最後に、「設定」タブです。 「このアプリについて」セクションでは、AdGuard VPN の現在のバージョンを確認し、アップデートをチェックし、公式ウェブサイトを訪問し、AdGuard の EULA とプライバシーポリシーを確認することができます。 「ライセンス情報」では、無料版から無制限版へのアップグレード、サブスクリプション管理、ログアウトを行うことができます。 そして、最も重要なのは、「一般設定」です。
本アプリの設定
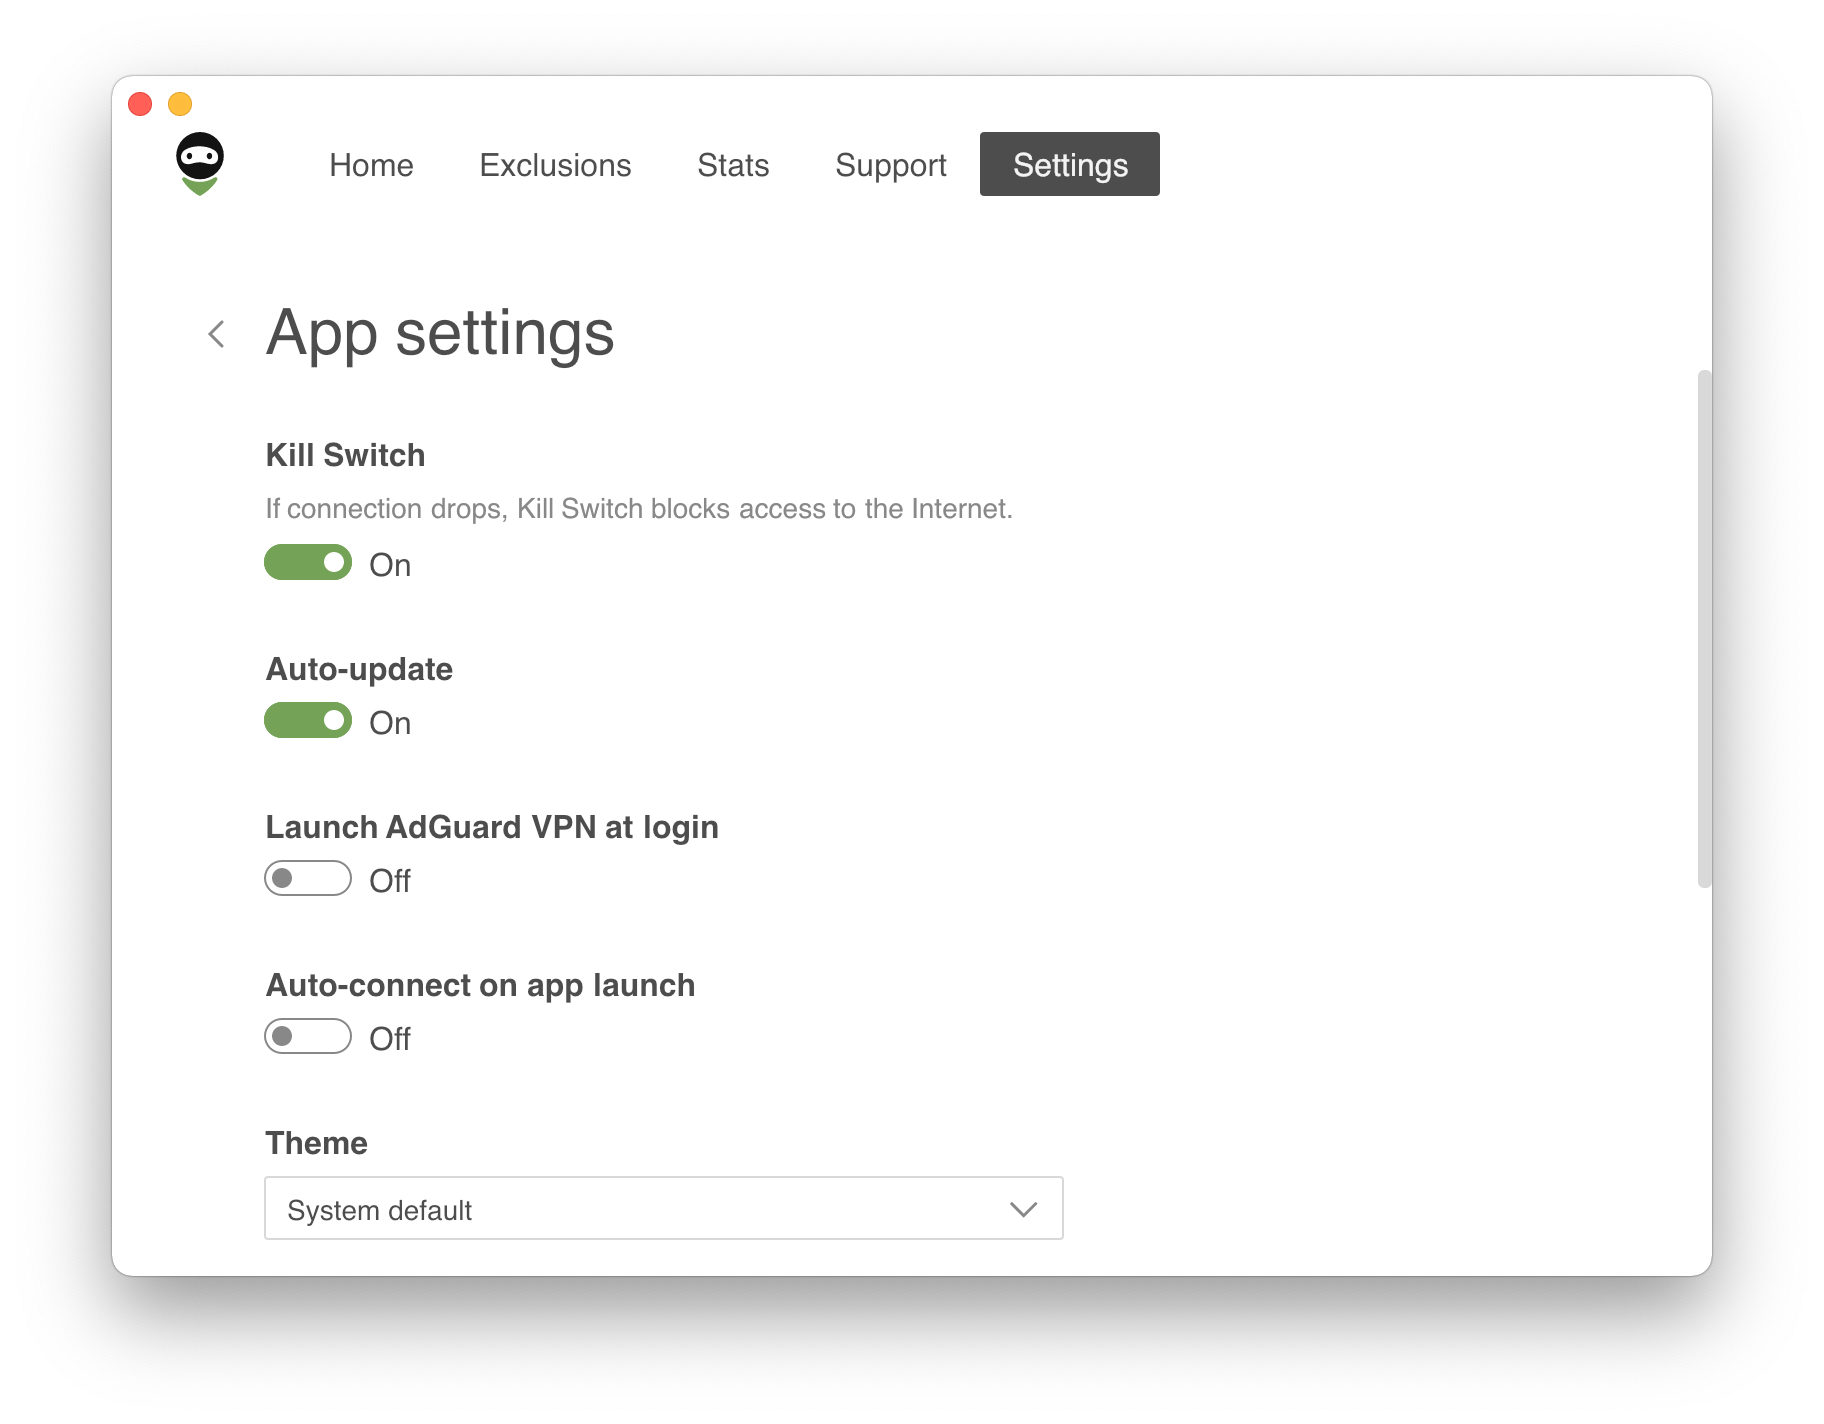
The first four basic features make the application more convenient and user-friendly, i.e. Kill Switch, Auto-update, Launch AdGuard VPN at login, and Auto-connect on app launch. さらに、カラーテーマは「ライト」「ダーク」「システムに合わせる」から選ぶことができ、後者はMacのカラーテーマとAdGuard VPNのテーマを一致します。
You can also allow AdGuard VPN to gather and send anonymous crash reports, technical and interaction data in order to help us improve our app. Last but not least, you can export logs from your Mac. サポートへのメッセージにログを添付したい場合などに便利です。
DNSサーバー
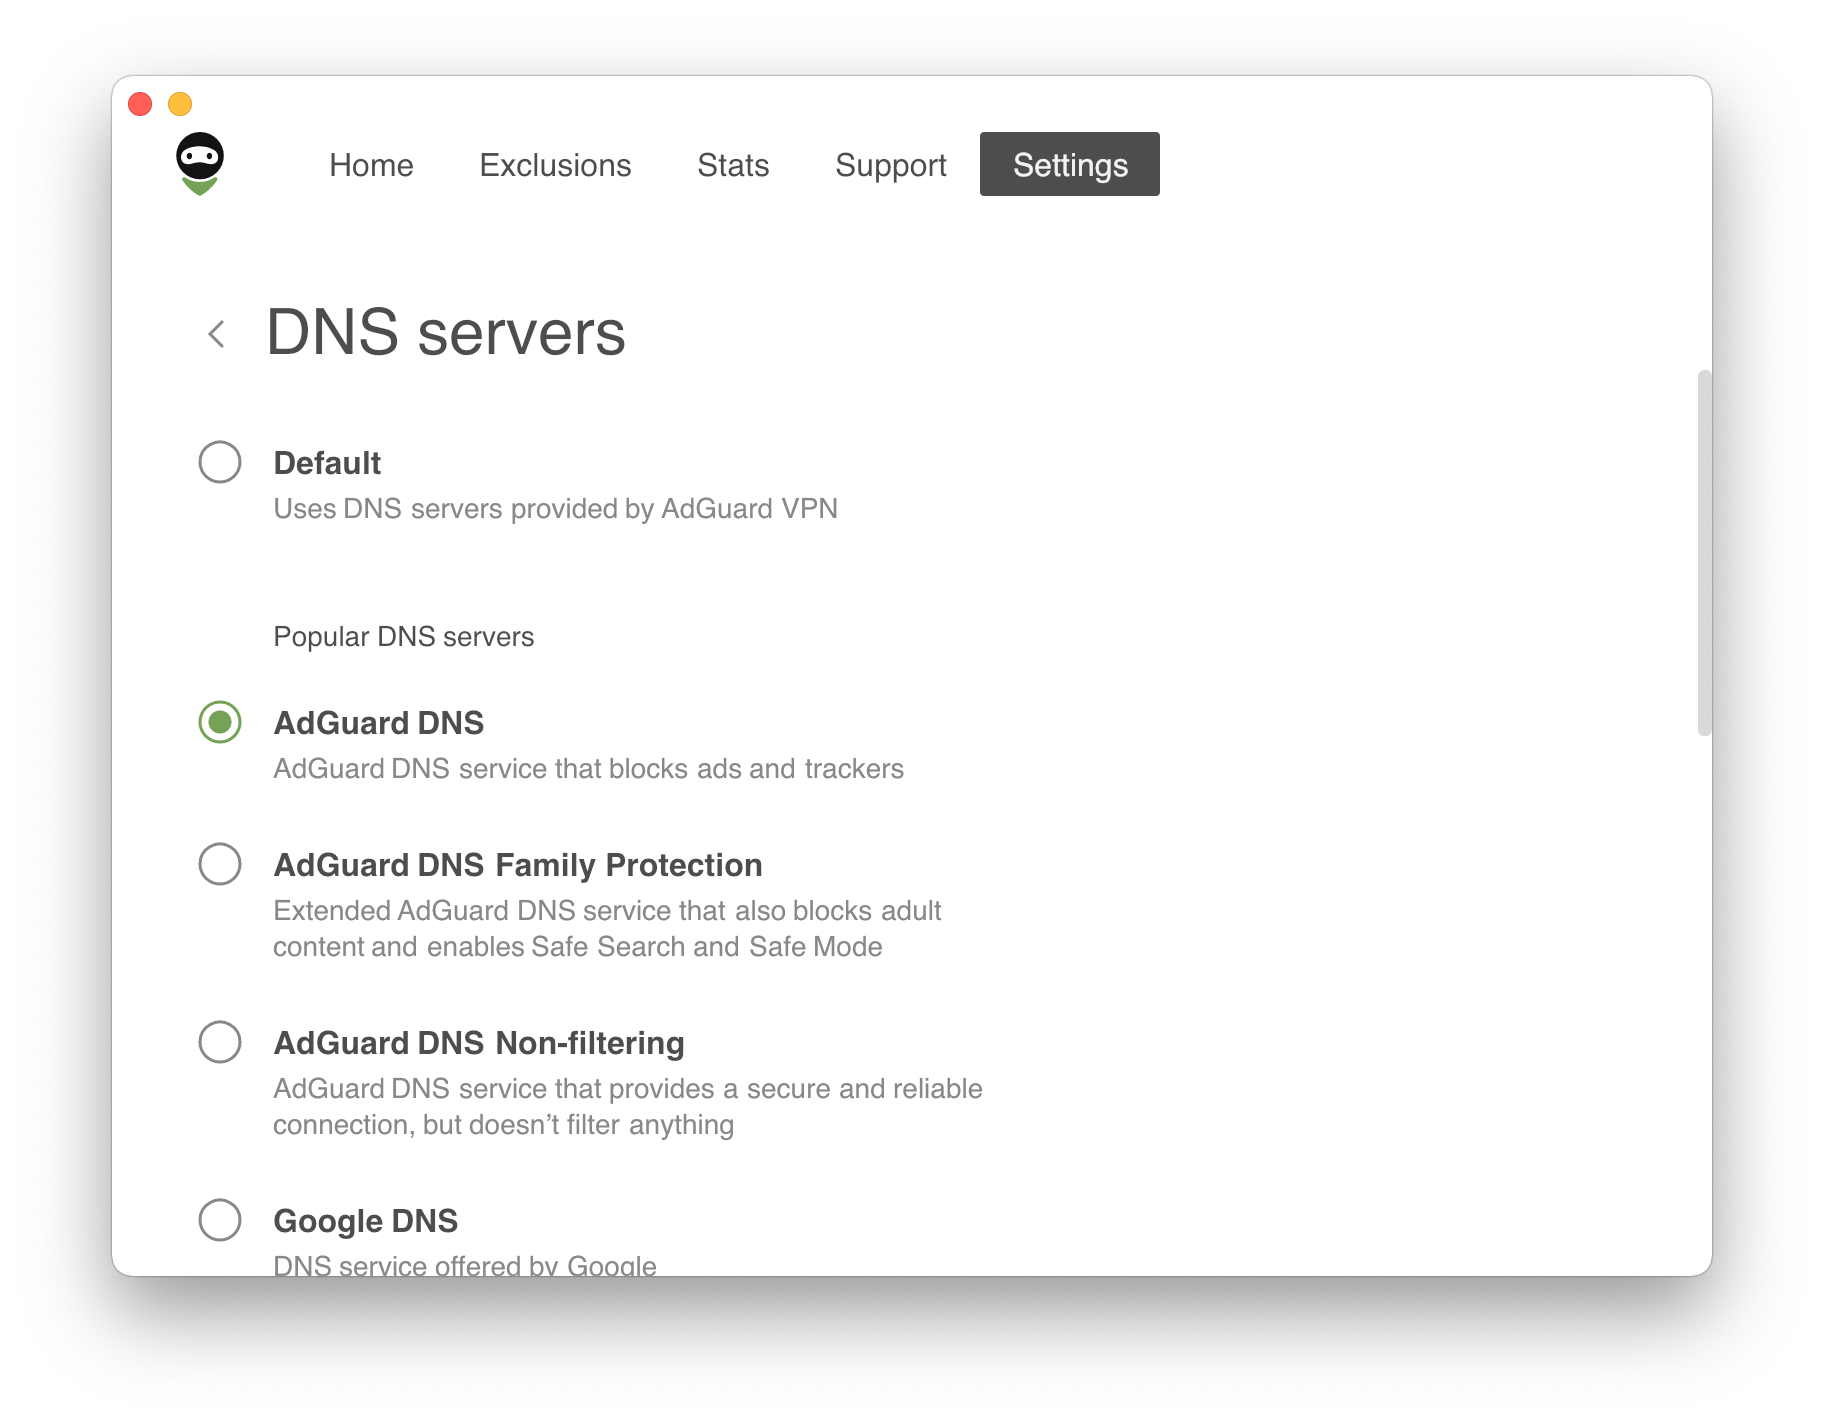
One or more DNS servers can be set up here. This is useful if you don't want to rely on the default DNS server provided by your ISP. Select one from the list of popular DNS services or add a custom server manually. We recommend adding AdGuard DNS, which not only encrypts your DNS traffic, but also identifies requests to malicious websites and redirects them to a “black hole”.
詳細設定
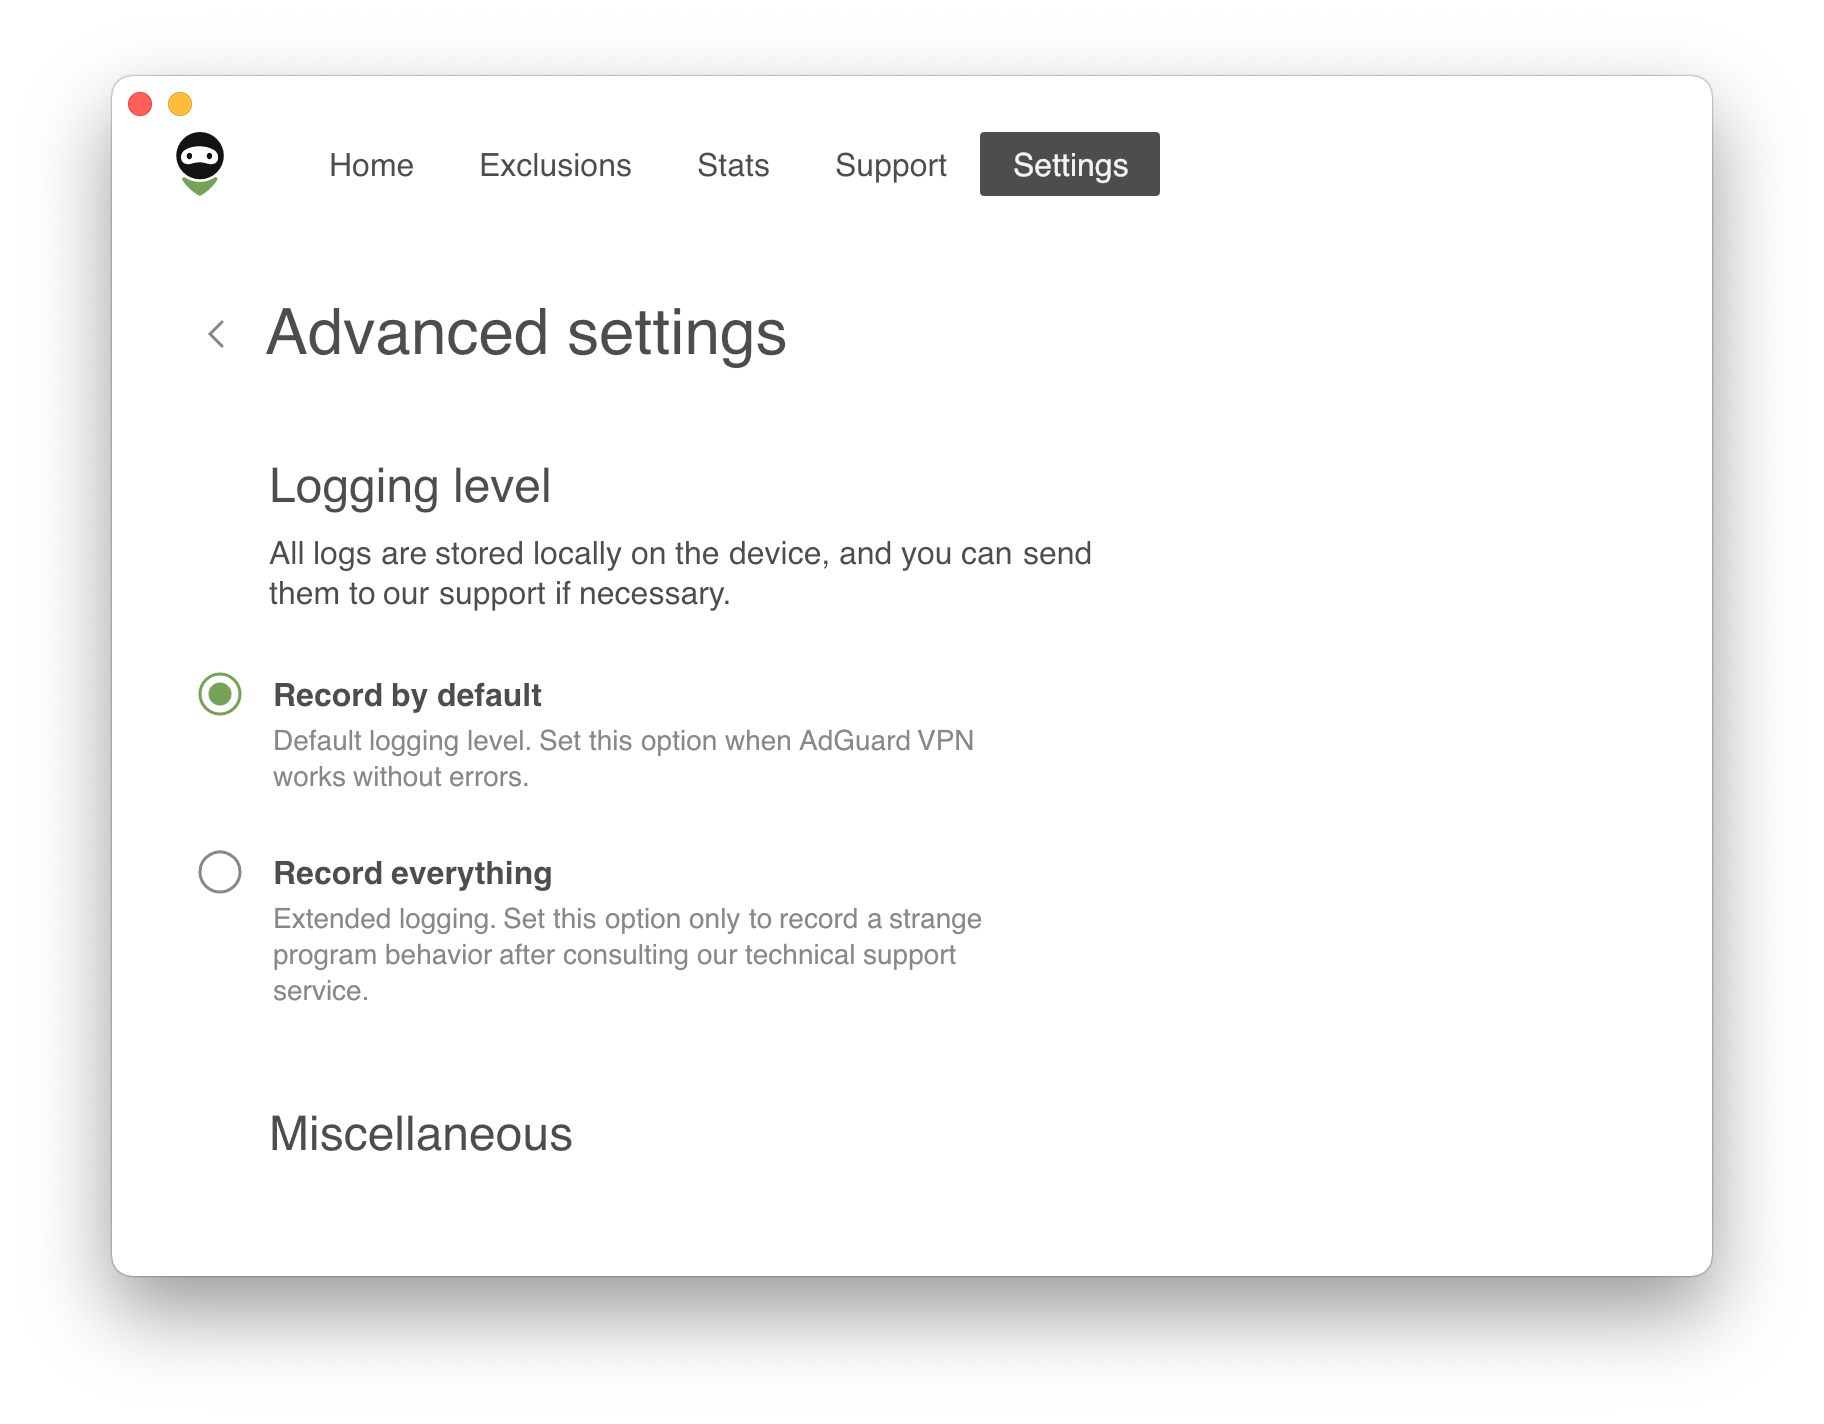
ログのレベル
ログのレベルは2つしかありませんが、最初のデフォルトの「通常記録」を使用することを強くお勧めします。 (※弊社のサポートにご相談いただいた後に、プログラムの異常な動作を記録する場合にのみ、「すべてを記録」オプションを選択してください。) If you have enabled the extended logging level, make sure to switch to the default one after recording logs.
メニューバーアイコンを非表示にする
このオプションは詳細設定にありますが、必要に応じて問題なくオンにすることができます。 メニューバーからAdGuard VPNアイコンを非表示にしても、アプリがバックグラウンドで動作しなくなることはありません。
Use QUIC
QUIC通信プロトコルは、HTTPの最新・最先端版です。 地下鉄やエレベーターの中でモバイルデータを利用するときなど、あまりよくない通信環境の場合でも、QUICをオンに切り替えることで、より良い通信品質を確保することができます。